1/6/2023
Printing Prior Bank Reconciliation Reports in QuickBooks Desktop
See images below for reference.
Reports > Banking > Previous Reconciliation
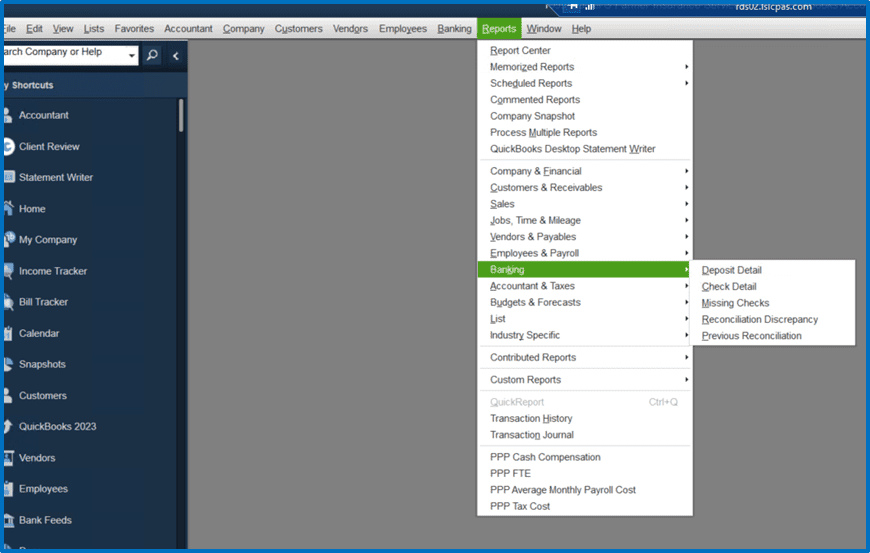
Select Previous Reconciliation Report
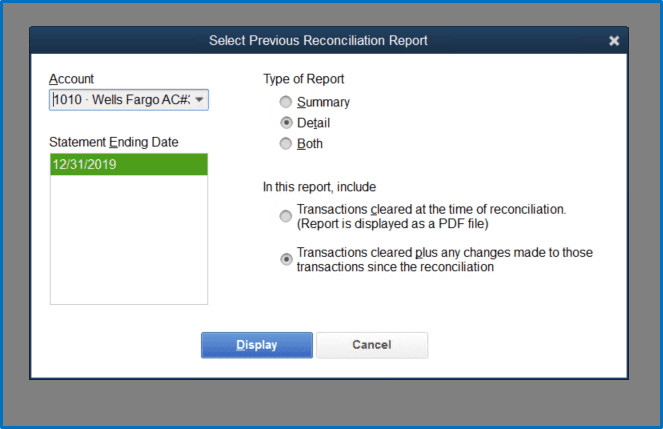
Display Report
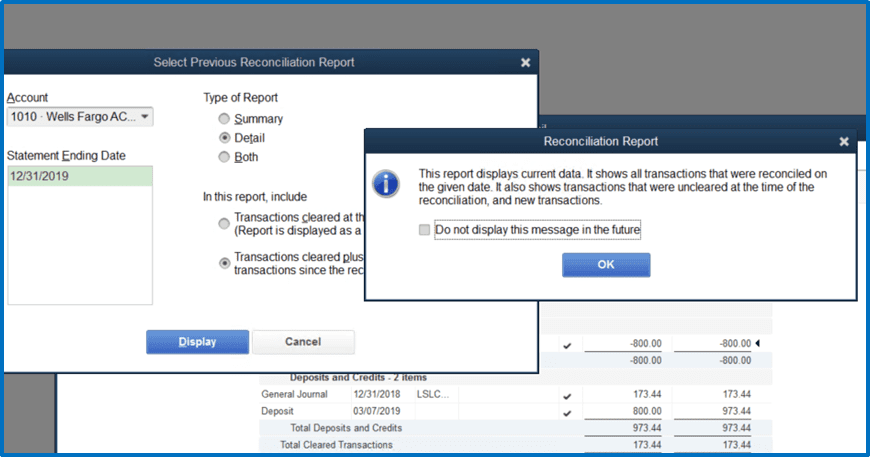
Print Report
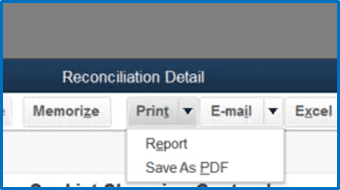
Print Report Options
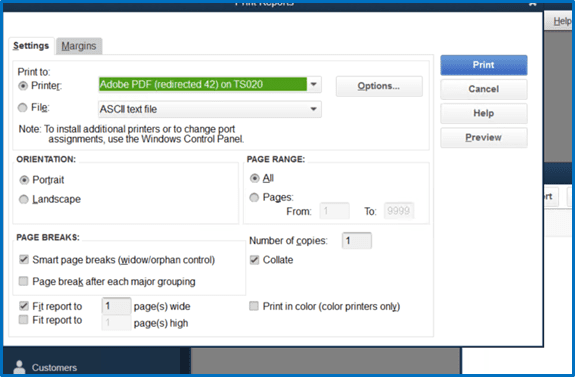
See images below for reference.


Now is a good time to review your vendors for 1099 information. You can send a note to the vendor or a W-9 to get the missing information before we go into the new year when it will be needed. Starting for 2023 when filing 2022 1099’s, if you have more than 10 you must file electronically or you may be assessed a penalty.
Desktop: Go to vendors, print/efile 1099’s, run the review 1099 vendors, review for missing information. Determine if you didn’t fill in the info or need to send the vendor a W-9. Once you get the information, go to the vendor file and update it. You can also drop and drag a copy of the 1099.
QBO: Go to expenses, in upper right prepare 1099’s, continue to 1099’s, you will see a list of your vendor’s that you have checked the 1099 box in their file. You will see in red any information that is missing. Determine if you didn’t fill in the info or need to send the vendor a W-9. Once you get the information, go to the vendor detail and update it. You can also drop and drag a copy of the 1099.
If you use the Accounts Payable function in QuickBooks, it’s important to make sure the bills are marked paid in the system. There are several reasons you may have open but paid bills. You may have cut a manual check, paid with cash or ACH, or used a credit or debit card to pay the bill. If you are not cutting the check against the bill, the bill will need to be paid manually, to close out the open A/P. This will be important for monthly reconciliations.
If you use bank feeds, this will need to be completed before you approve your transactions. This will allow QuickBooks to match the transactions and avoid duplication.
If you use the Accounts Payable function in QuickBooks, it is important to make sure the bills are marked paid in the system. There are several reasons you may have open but paid bills. You may have cut a manual check, paid with cash or ACH or used a credit or debit card to pay the bill. If you are not cutting the check against the bill, the bill will need to be paid manually, to close out the open A/P. This will be important for monthly reconciliations.
If you use bank feeds, this will need to be completed before you approve your transactions. This will allow QuickBooks to match the transactions and avoid duplication.
Go to Vendor > Pay Bills
For the manual check, cash, ACH or Debit Card transactions, in the pay bills window, select the bill to be paid as you would to print the check, enter the day it was paid, choose the Method- Check then choose Assign check number, and then in the Account dropdown window choose the appropriate account. Then hit the Pay Selected Bills button.
In the pop-up window choose Let me assign check numbers below, enter the manual check number and in the case of Cash, Debit or ACH payment you can leave it blank or type ACH or Debit.
For credit card payment enter the date it was paid, choose the Method- Credit Card then choose the appropriate credit card in the Account dropdown window. Then hit the Pay Selected Bills button and these bills will be removed from your A/P.