QuickBooks/ Bookkeeping Tip of the Week: ARCHIVED COLLECTION

null
down

Welcome to our archived collection of amazing tips!

null
You have over 100 helpful bookkeeping reminders and often step-by-step instructions on useful tools within QuickBooks (Online and Desktop). If you are interested in more in-depth training for your staff that goes beyond these tips – please contact us: I need QuickBooks Training.

1/21/2022

Angela’s Tip

Create an Expense Category in your General Ledger: “Small Equipment $500 or more”

Record purchase of equipment/items that cost more than $500 but less than $2,500, such as: printers, computer keyboards, laminating machines, copying machines, office Keurig coffee makers, etc.

This will help when it comes time to reporting for Business Property Taxes to their respective County Assessor’s office.

1/14/2022

Candy’s Tip

Bookkeeping Workflow Tips

As tasks continue to pile up and challenges take up more and more time – your workflow is vital.

To stay efficient and organized, you can:

  • Create a digital file that lists step-by-step instructions for daily, weekly, monthly, quarterly, and yearly tasks.
  • Keep a Priority To-do list.
  • Set up reminders of important due dates.
  • Utilize the To-do’s feature in QuickBooks to customize your tasks.

1/7/2022

Tisha’s Tip

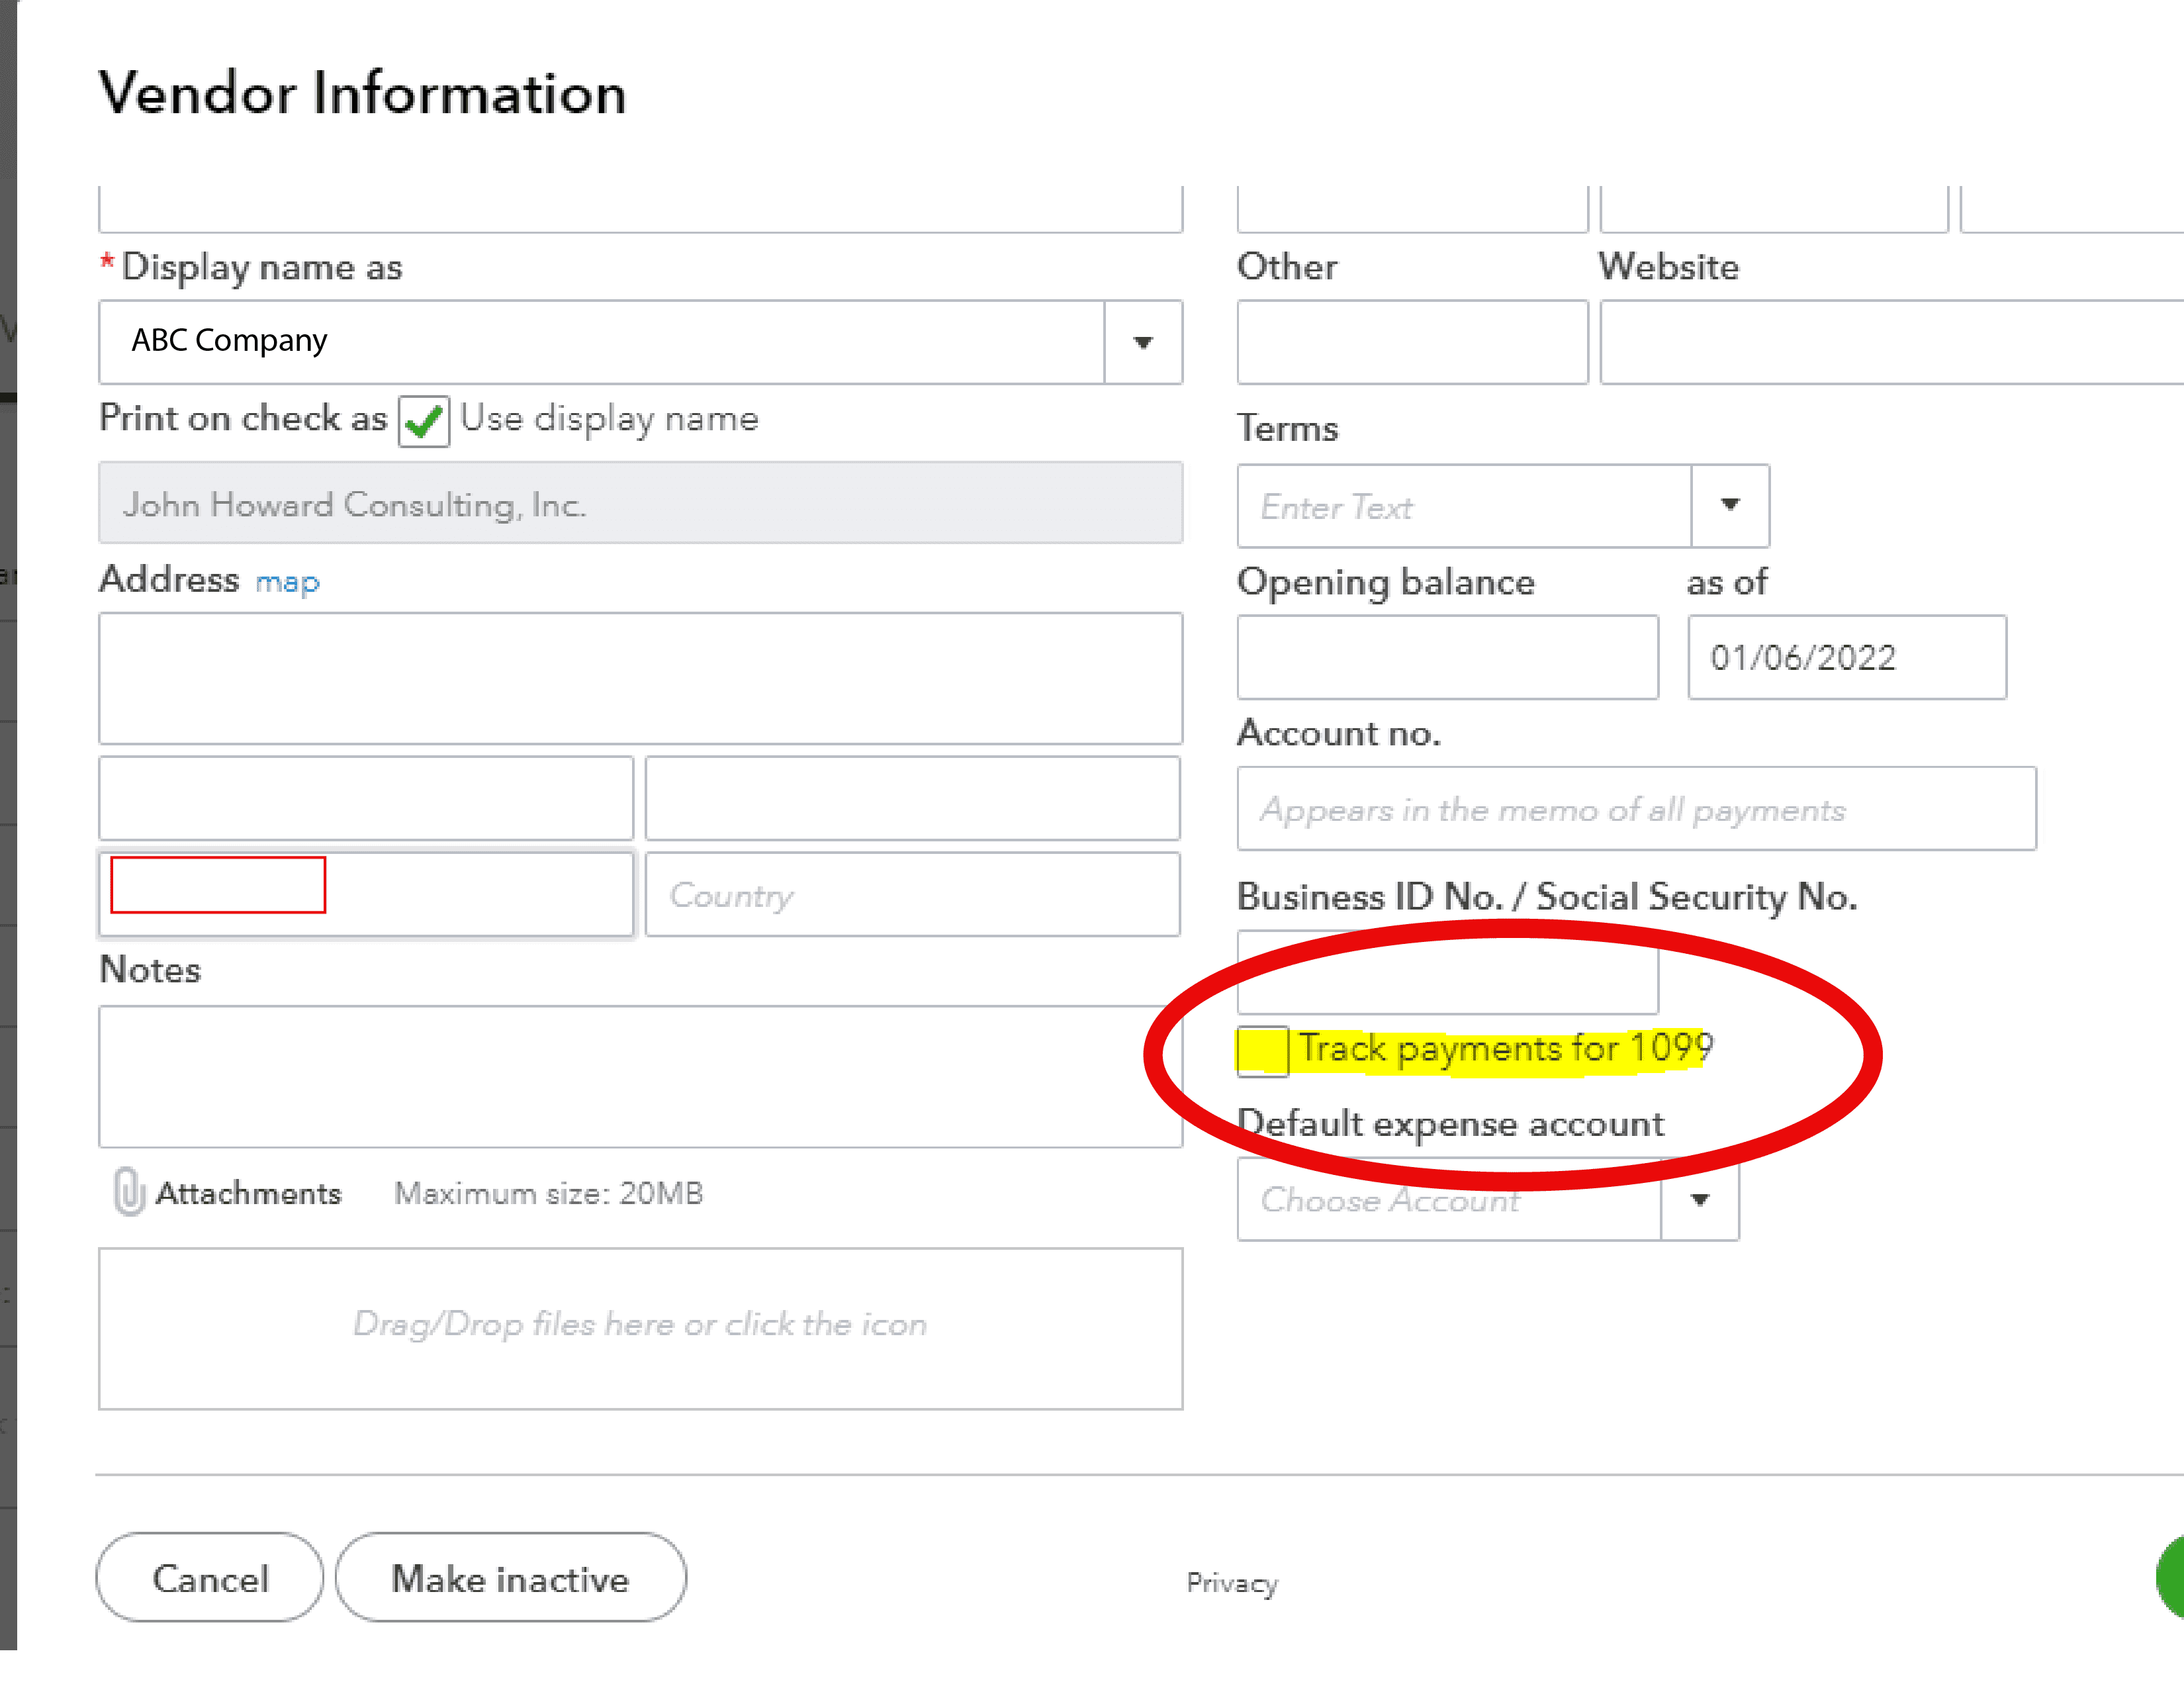
How to Set up Vendors for 1099’s in QuickBooks Online

To set up vendors for 1099 make sure the box is ticked “To Track  Payments for 1099 “ in Vendor information below highlighted in yellow.

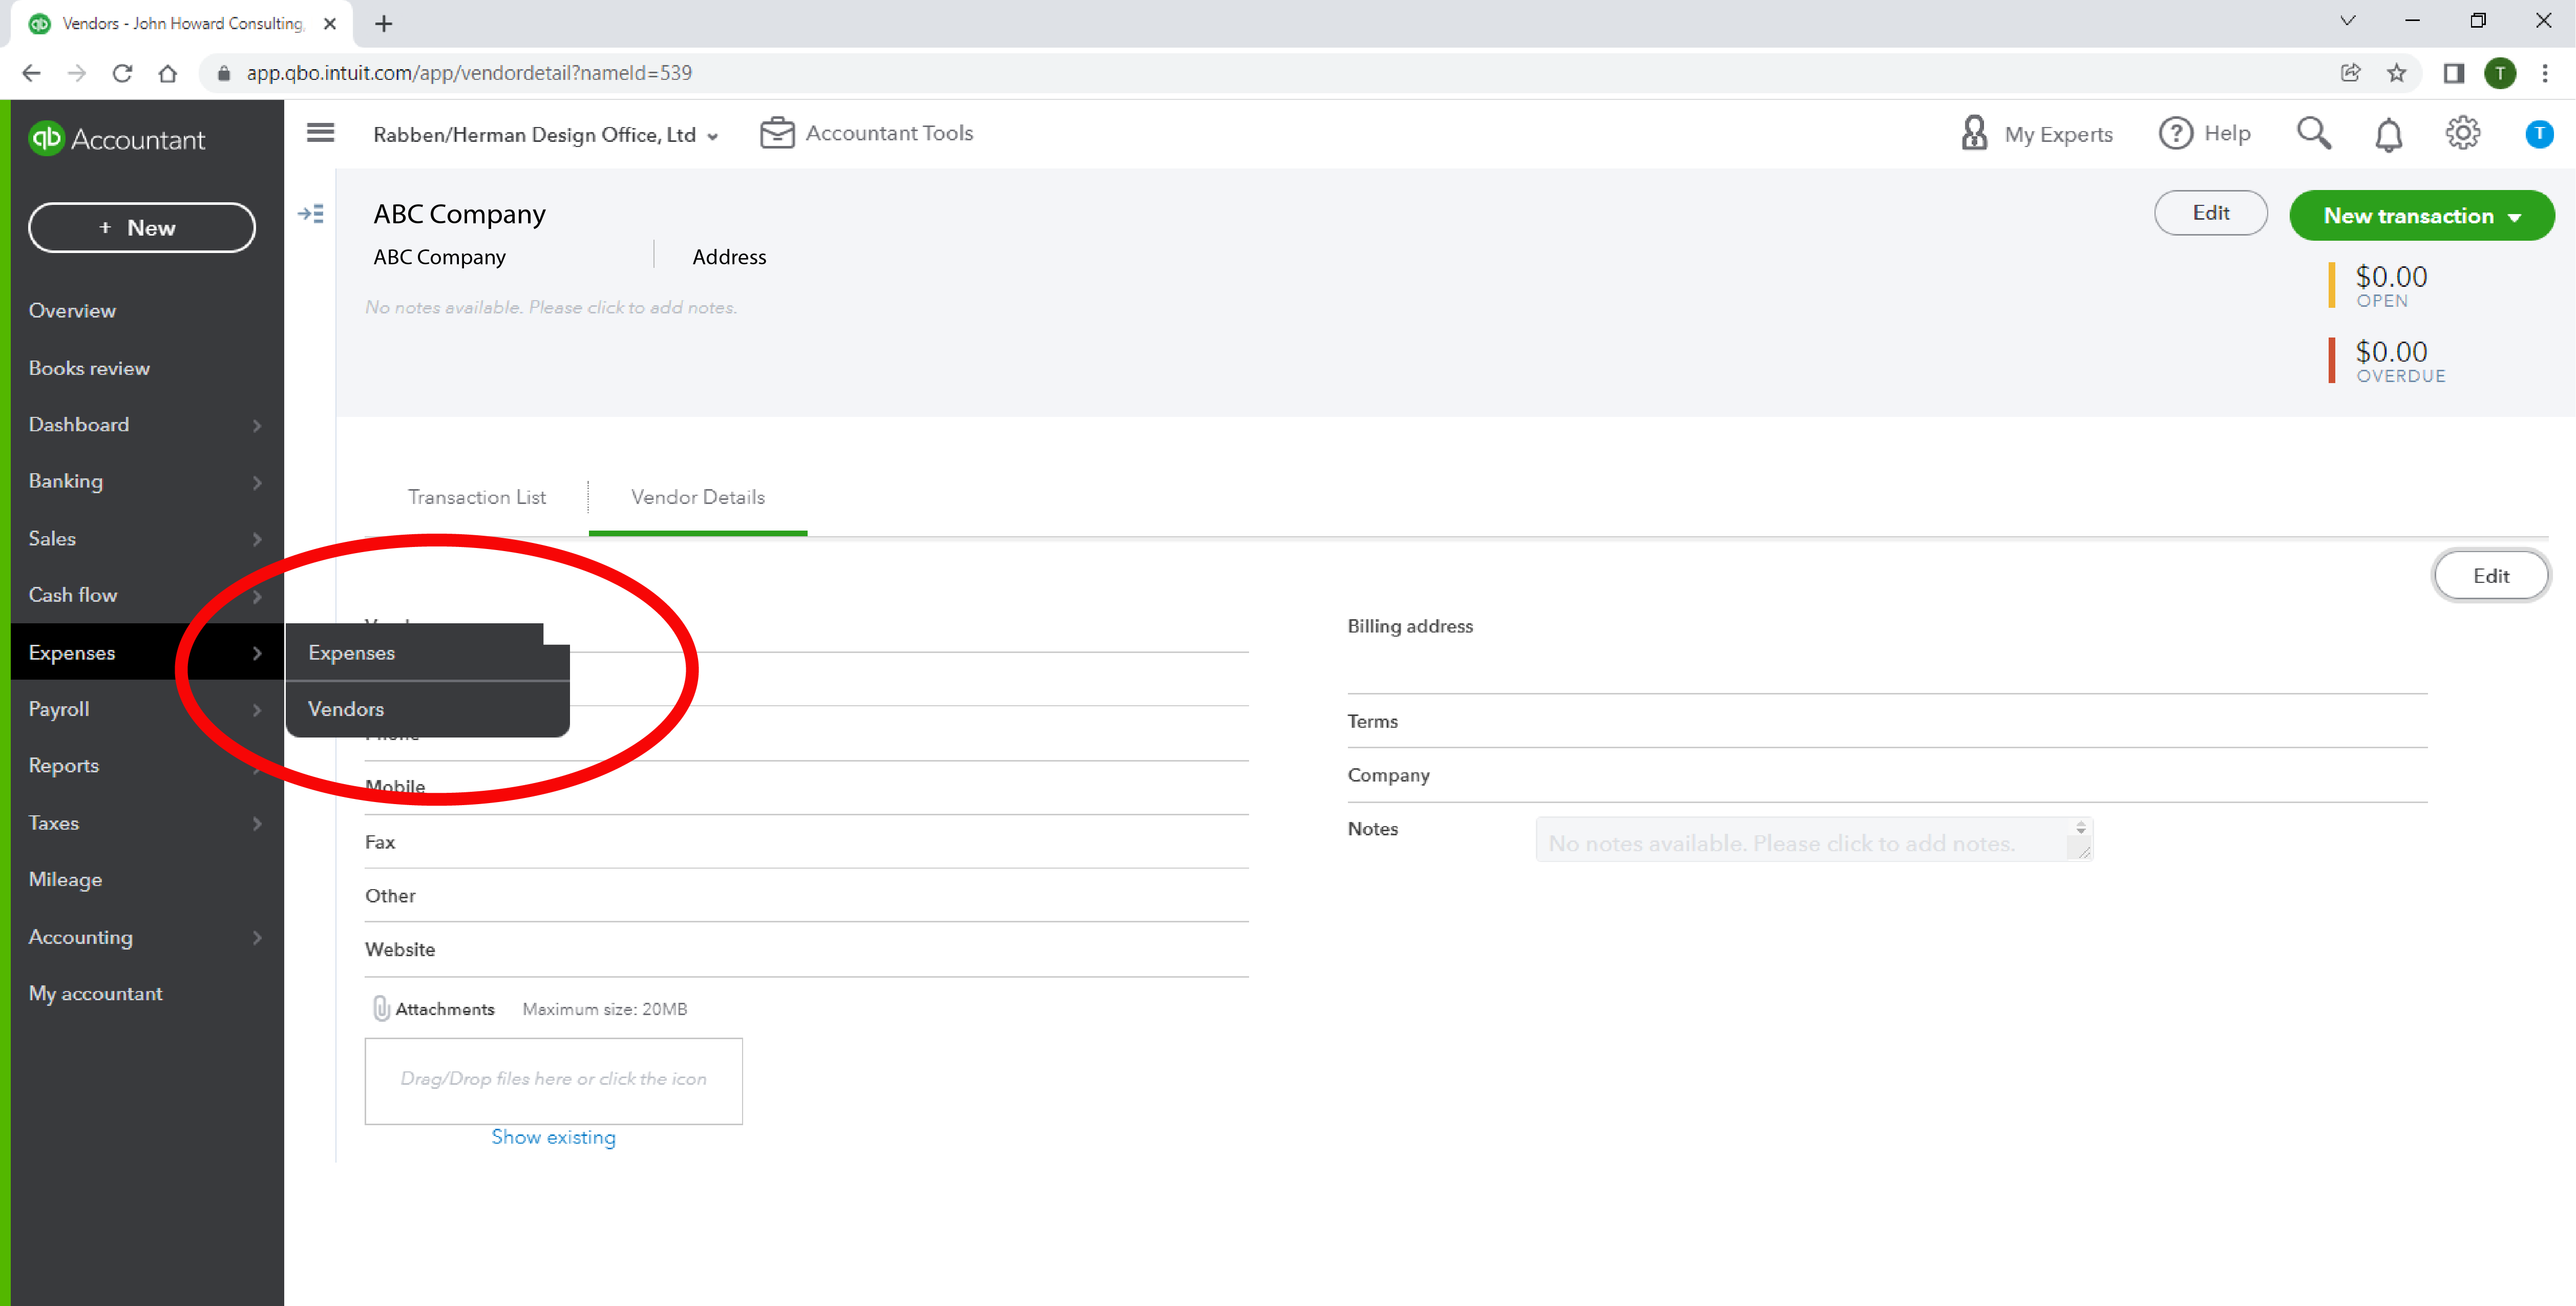
To get to vendor info:

  • Go to Expenses (Bar on left hand side of screen) click on vendor and then click on vendor details at top underlined in green.
  • Than click on Edit button- that will take you to the bottom shot below of vendor info to tick the box for 1099.

Note: Make sure you enter the Business ID/ social Security # from the completed W9 from you should have had your client fill out before cutting them a check.

This is good to start in January and do throughout the year so when its time to process 1099’s all the ground work is done to be ready to process 1099’s.

12/31/2021

Valerie’s Tip

What to do when a Customer Check is returned by the bank uncashed – QuickBooks Desktop

Last week we showed you what to do with QuickBooks Online, and this week’s tip will be for the Desktop version: Customer check returned by bank uncashed – thank you, QuickBooks for this info!

Use the Record Bounced Check feature:

1. Go to Customers, then select Customer Center.

2. Select Transactions tab, then choose Received Payments.

3. Double-click the payment you want to record as NSF.

4. On the receive payments window, select the Record Bounced Check icon on the Main ribbon tab.

Note: The check must not be waiting to be cleared in the Undeposited Funds account, as it would have to have cleared the bank in order to bounce.

5. In the Manage Bounced Check window, enter the following information, then select Next.

Note: All these fields are optional. You can leave them blank if there weren’t any additional charges from the bank or if you don’t want to charge your customer for it.

  • Bank Fee and Date
  • Expense Account for the Bank Fee
  • Class
  • Customer Fee (how much you will charge the customer)

6. QuickBooks will show you the Bounced Check Summary, for you to know what will happen behind the scenes. For example, you may see:

  • The following invoices will be marked unpaid
  • The following fees will be deducted from your bank account.
  • This invoice will be created for the fee you want to charge your customer.

7. Select Finish.
12/24/2021

Valerie’s Tip

What to do when a Customer Check is returned by the bank uncashed – QuickBooks Online

Customer check returned by bank uncashed. It can be returned for any reason, usually NSF, but could be account closed, account can’t be found, irregular signature or other.

Use a journal entry to add the amount back to the customer receivable and deduct it from the bank. Do not go back and change your deposit and take the check returned by the bank out of the deposit. You need your original deposit to remain as it so you can reconcile your bank statement.

Example of journal entry:

Go to make a journal entry.

Credit the bank account that the check was originally deposited into, in the memo make a notation of why the check is being returned. Debit the Accounts Receivable for the customer whose check was returned, in the memo make a notation of why the check is being returned, add the Customer Name. You can also add any bank charges to the journal entry by crediting the bank account and debiting bank charges.

This will allow you to keep your deposit in tack and clear it in your bank reconciliation. It will also allow you to clear the returned check on the bank statement and the bank fees.

Once the customer repays the amount, you will receive it just like normal. 

If the new check is returned, you can again make the same journal entry to show the amount outstanding on the customer’s account and deducting the amount out your checking account.

Get Tips Sent Straight To Your Inbox Every Friday

null
Fill in the form below.